Hung up on DIY hi-fi?
Then welcome to

Making a 'pod', an enclosure for smaller items of hi-fi.
How to build an attractive and easy to make small enclosure.
![]()
![]()
Decibel Dungeon
Introduction
One of the most asked questions with DIY hi-fi is 'where do I find a really good case?'. These days, with many excellent kits around, it can be quite easy to put together a good amplifier, DAC, pre-amp etc but then you have to put it in a case and realise that either you have to pay out a lot of money for something or put up with a boring rectangular enclosure that doesn't look much better than the stuff you can buy at the local hi-fi discount store!
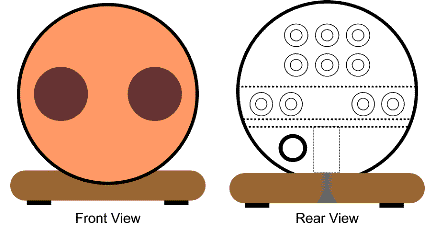
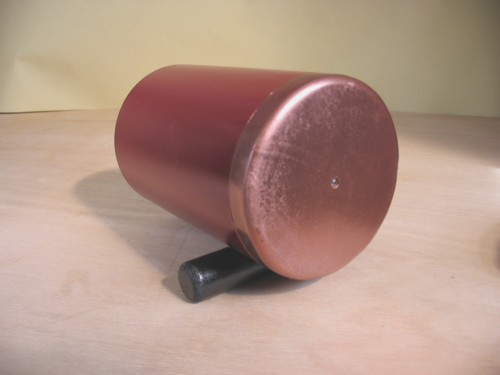
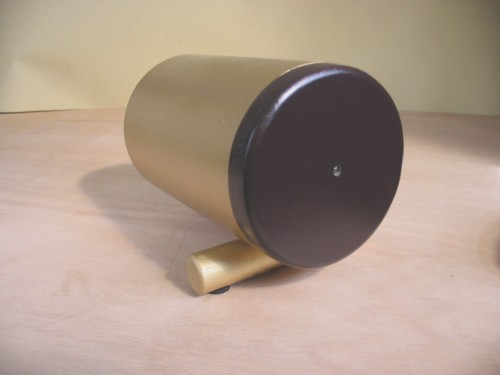
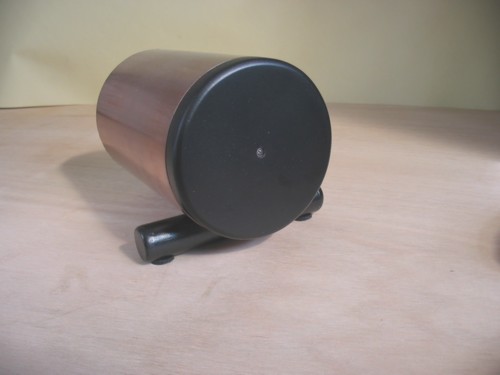
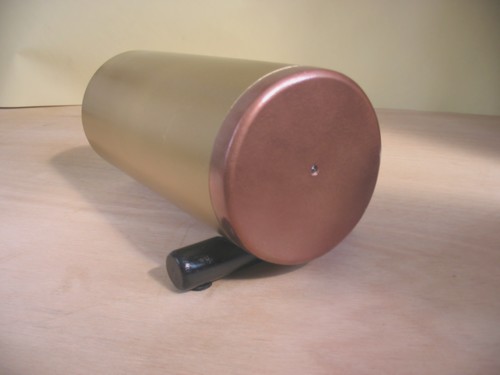
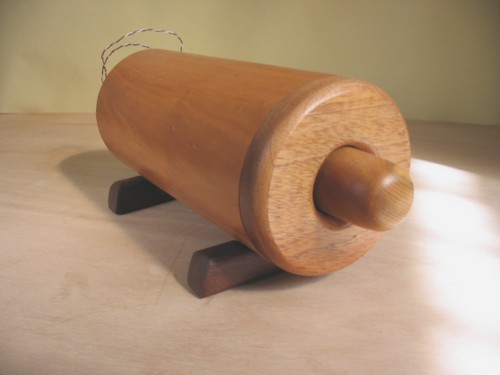
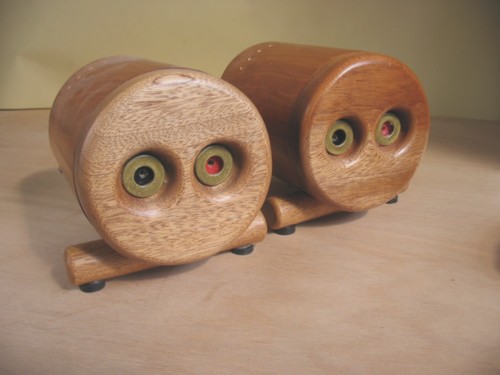
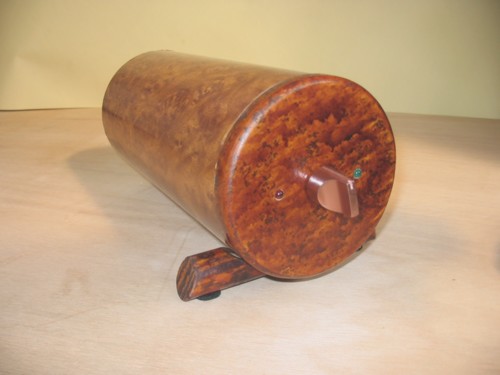
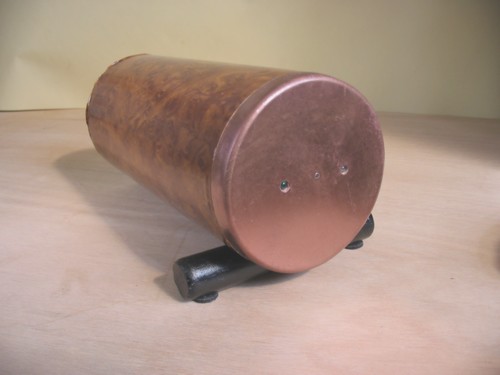
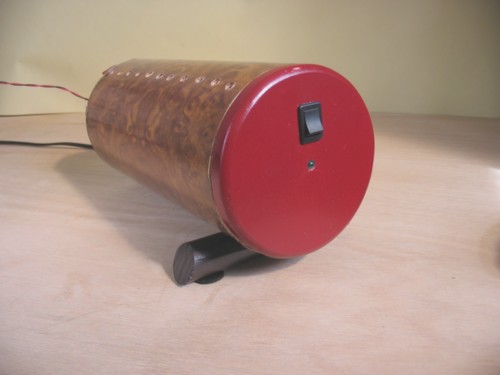
The pod (pre-amp version) as it looks from the front and rear. It is quite possible to have three sets of inputs and two sets of outputs for a pre-amp, and a power input socket. Power amps and DACs etc require less sockets.
The materials.
The picture below shows the materials required to make up one pod.
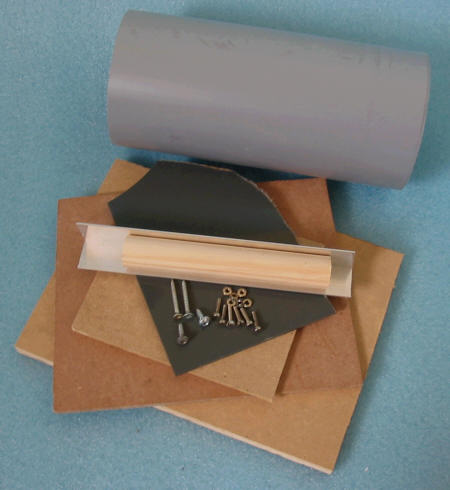
Quite a small shopping list for this project!
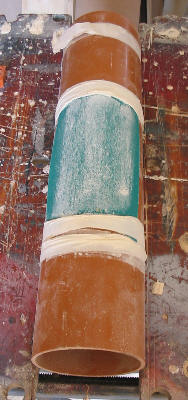
- A length of 110 mm diameter plastic pipe, the sort used to take away household sewage. You can choose what length you need but I find around 200-250 mm is ideal.
You can buy this type of pipe at builders merchants and DIY stores. It usually comes in 3 metre lengths though! As this pipe is widely used in building, it is always worth asking on building sites if they have any short lengths that they will be throwing away. I have obtained quite a bit of pipe that way!
- A 120 mm square of 12 mm MDF
- A 110 mm square of 6 mm MDF.
Neither of these thicknesses is critical and you could use 12 mm for both items.
- Another piece of 6 mm MDF about 95 mm wide and just shorter than the length of the pipe.
Again, the exact thickness is not too critical but it does need to be stiff. You could substitute a thick plastic or even aluminium.
The amount of MDF required is very small so again, it's worth checking your shed, or seeing if somebody is throwing away small off cuts, before buying a large sheet!
- A 110 mm square of thin rigid plastic or aluminium.
- A 200 mm length of aluminium angle 25 mm x 25 mm.
- A 150 mm length of wooden broom handle.
- A piece of scrap timber about 25mm x 12 mm x 80 mm
- 8 M4 nuts and bolts long enough to join the angle to the 6 mm MDF.
- 2 round head 20 mm screws.
- 2 countersunk 25 mm screws.
The tools.
The tools required are:- An electric drill and various bits.
- A mitre saw to cut the pipe.
- A hacksaw to cut the angle
- A jigsaw to cut the MDF and plastic.
- A file to smooth the aluminium
- A smaller screwdriver.
- A compass to draw circles and a ruler.
- Some sandpaper.
Construction.
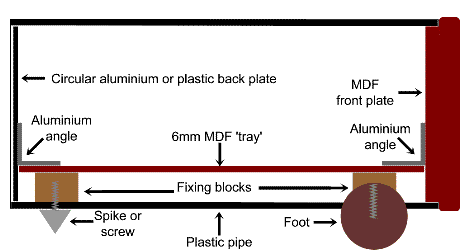
The pod design.
- Cut the pipe to length. Make sure that you get a nice square cut at either end.
 - It's very difficult to cut a longer length of this pipe so that it has a square cut! The pipe tends to 'wriggle' around and the saw blade cannot cut squarely. So do a rough cut on a piece of pipe just longer than you actually want and then make a second squared cut with the mitre saw.
 - Cut a circle from the 12 mm MDF slightly larger than the diameter of the pipe. If you cut this out and then drill a 5 mm hole through the centre, you can mount the MDF disc on an M5 sized bolt. You can then put it in an electric drill and turn it against some sandpaper to shape it to a perfect round. I find that if the sandpaper is sitting on something slightly 'giving' like a piece of polystyrene (yes the Decibel Dungeon favourite), the disk doesn't 'jump' and you get a smoother round shape. The 5 mm hole can be used later to mount an LED (or made larger for a volume control spindle)!
- Do the same for the 6 mm MDF disk that should be a tight fit into the pipe.
- Glue the two MDF disks together so that their centres are aligned exactly.
- Cut out the plastic disk that will fit snuggly inside the tube at the other end to the MDF disk.
- Cut the 'tray' from the rectangular piece of 6 mm MDF. It should be about 95 mm wide but you can change the width according to how low you want the tray to sit in the pipe. For the length, subtract 6 mm for the MDF disk and another 3 mm for the plastic disk (or whatever thickness that you are using).
- Cut two pieces of the aluminium angle the same width as the tray.
- Drill four holes in each of the angle pieces. These holes should be slightly larger than the bolts you use to allow for a little adjustment. Drill the holes 20 mm from either end and 12 mm from the angle.
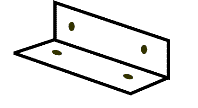
- Bolt the angles to either end of the tray.
- Take a scrap piece of pipe about 50-75 mm long (with one square cut end). Put the MDF disk into the squared end and place it on a flat surface. Put the tray into the tube so that the angle lies on the MDF disk. Mark the position of the two holes on the MDF. Remove the tray and drill holes for the 20 mm screws.
- Screw the tray to the MDF disk. Take the 5 mm drill and drill through the centre of the MDF and through the aluminium angle. (If you want to use this hole for an LED, you will need to open it up with a larger drill but not all the way through. Of course, you could also make the hole bigger and use it for a volume control or a rotary switch. It all depends what you are putting in the pod!
- Remove the MDF disk and of you are using the 5 mm hole for an LED, the hole will need to be open up with a larger drill so that a rebate is formed as shown in the diagram.
- Use the same procedure to fix the back plate in position. When it is bolted to the tray, work out what holes you will need for connectors etc and carefully mark out where they will go. You may need to cut pieces from the aluminium angle but don't cut away so much that you weaken it too much.
- Assemble the tray with the rear disk and the MDF disk. Cut two bits from the scrap timber to fit under the tray at either end. These blocks should come flush with the back plate. In other words, they will almost touch the pipe when the tray is inserted into it.
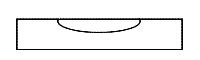
- Make a 'foot' from the broom handle. Cut a piece about 150 mm long. Use a short length of pipe to mark out a semi-circle on the middle of the broom handle that is just over half its diameter (as shown above). Then cut out the bit for the pipe to sit in and finish off the shaping with sandpaper.
 - You can easily make a tool to help you get the correct shape for the foot. The tool is made from a 400 mm length of pipe that has a sheet of sandpaper taped to it. The pipe 'sits' between the jaws of a 'Workmate' bench and the broom handle is then rubbed back and forward over the sandpaper.
 - When the sanding is complete, drill a small hole in the centre of the cut out to accept one of the 25 mm screws. Countersink the hole on the bottom of the foot. Now mark off the same distance from the edge of the cutout to each end and use the mitre saw to make either square cuts, or if you prefer, angle cuts. Sand the foot to remove any rough edges.
- Insert the tray assembly into the pipe, noting where the blocks are. Approximately 25 mm from either end of the pipe drill holes through the pipe such that you can screw into the centre of the wooden blocks.
- Screw on the wooden foot. You can use some glue as well if you think you need to. Screw the other screw into the hole at the other end of the pipe. You can adjust the angle that the pod sits at by adjusting this screw.
- Be careful if you glue on the foot as some glues will dissolve paint!
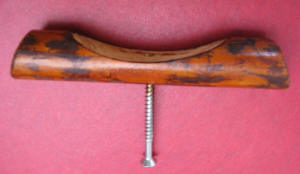
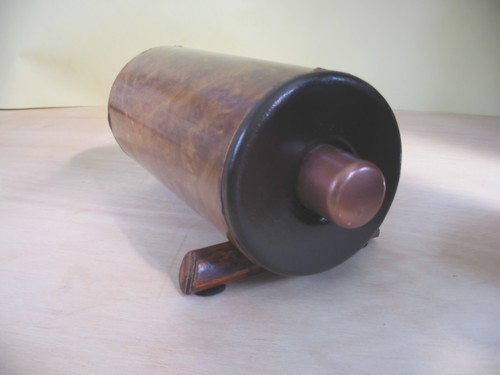
A finished 'foot'. The large screw is only used to hold the foot while painting it.
The finish is a 'special' using wood stain and varnish.
Please note that I reply to all enquiries so if you don't hear from me is because your account is bouncing or the email addresss you supplied is invalid!