| | | | |
|
The

Gainclone Gallery
Gainclone Gallery page 3.
Click on the pictures for a full-size version.
|
|
|
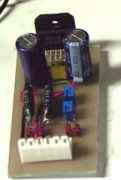
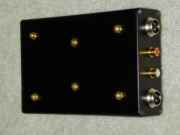
Jack ?'s two channel LM1876 Gainclone showing just how small these amplifers can be, even with two channels.
|
|
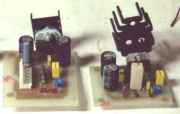
Two more single channel Gainclones by the same builder who makes his own PCB's.
|
|
|
The next six pictures are from Carlos Filipe Machado, from Lisbon, Portugal who describes his GC in his own words.
|
|
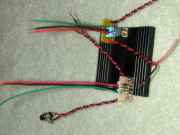
I made this LM3875 based amp with two small pieces of “bread-board”, with 1mm solid-core copper cable. I made some slight variations to the 'usual' minimal inverted GainClone design.
|

|
There are two 1000uf electrolytic caps per channel (+/-), right next to two 6.8uf, and then 0.1uf polyesters right on the chip’s pins. There is also one 0.1uf between + and – pins.
|
|
I used 50k multi-turn pots to adjust DC-Offset, and I can easily get 0.0 mV.
This is a power amp, so no input pot is used.
|
|
The box for my first GainClone is modified from an old Pc that I bought for 17.50 Euros, it’s small for a computer and smaller than standard Hi-Fi.
|
|
The mains cable is Kimber 4PR speaker cable, and signal and speaker cable connections from the modules to the plugs are UTP Cat.5 cable.
|
|
The sound of this amp is truly amazing, it has an impressive definition on the bass, mid and treble (which is very extended and clear, but never aggressive).
What impressed me more is that this chip seems to drive any speaker, I even tested some really small speakers with 10cm woofers and it filled a big room with an impressive bass slam and definition.
|
I would never have believed how good this amplifier is just by reading the specs on the datasheet, I had to try it.
I was also sceptical about such a low amount of capacitance on an unregulated PSU for a power amplifier, but believe me, it’s right on the mark. It’s silent and the sound is fast and detailed.
Carlos Filipe Machado, Lisbon, Portugal, July 2003.
|
|
|
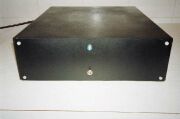
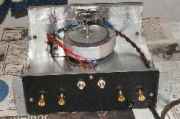
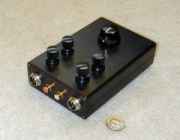
Paul Sziebert's LM1875 based Gainclone with an interesting retro/modern look.
|
|
Using standard components, this LM1875 amp runs from a 12V battery with only 10uF for the decoupling caps.
|
|
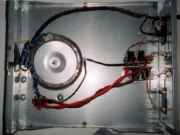
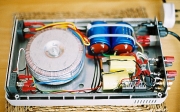
The neat interior of Paul Sziebert's Gainclone.
|
Paul Sziebert from Foster City, CA. (just south of San Francisco), tells of his chip amp experiences and how he came to build this battery operated Gainclone.
|
|
"I had resisted diy electronics for many years (unless you include the countless items I disassembled as a child) due to my perception of the long, steep learning curve involved. I was focused on my studies at university, but tinkered with diy loudspeakers a fair bit. However, my living situation had always restricted my ability to implement my designs due to MDF dust, noise, etc. Then I realized that I could engage myself in similar mental gymnastics by learning more about this gainclone thing I had read about. and I could build as many as I wanted on my dining room table without any MDF dust or noise!
|
The pictures I posted at the DIYAudio forum are of my first complete chipamp, by which I mean that it is in a proper enclosure with standard connections to it. My first try was actually with an LM3875 wired point to point using photos I found online as references more often than I used the data sheet. The most difficult part was figuring out the power supply (+/- ground) especially with batteries. seems silly to me now! Somehow my first try with the 3875 fired right up and worked quite well except for a little RFI it picked up. I was ecstatic! The pictures I had found online were an incredible inspiration and resource for me."
|
|
|
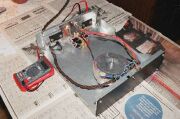
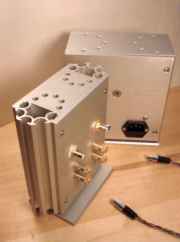
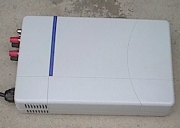
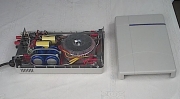
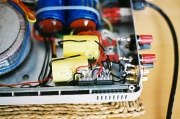
Art Taylor built this amp in order to satisfy a friend's request for a compact but flexible case for their "Gainclone" project. After one listen he realized something great (and cheap) was going on so he built one for himself!
|
|
The upright design allows lots of space for mounting switches and jacks. His other amp has a mute switch and two inputs. The vertical heat sinks dissipate heat so well that this LM3875 with 25V rails never even gets warm and will provide two LM1875s or a LM3886 with adequate cooling.
|

|
Quarter inch aluminum was used to make machining easier and provide a rock solid structure. The amp uses a Scott Nixon Ampkit board since Art's PTP versions were always humming to some extent and looked terrible. he used mini XLRs and braided #20 solid core for the umbilical and the internal power wiring.
|
|
This amp is dead silent while used with 104db Klipsch La Scalas and is extremely clean, articulate and not grainy. It uses a single 225VA Plitron for compactness but a dual PSU, housed in a second PS chassis, is on the drawing board. Volume is controlled by an Alps Black Beauty with a stepped attenuator also lined up for the future.
|
|
|
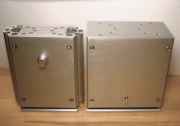
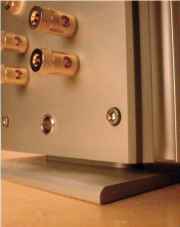
Peter Ream built his Gainclone into this plastic case that was formerly home to a computer CD drive.
|
|
Peter has made a good job of getting everything into a comparatively small space! The project came in at under 28UKP and took just six hours to complete.
|
|
You could have forgiven him for using electrolytics in such a small space but he stuck with those nice yellow polyprops!
|
|
And even found space for those large filter caps.
|
|
|
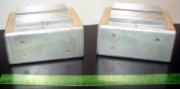
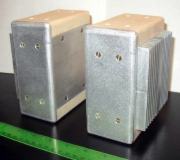
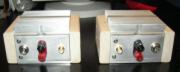
Another pair of attractive monoblocks built by Dave Chnowski.
|
|
Dave has clevely designed his amps to sit in either vertical or horizontal orientation. When vertical, cooling is enhanced by the air passing through the fins of the heatrsink.
|

|
This is a non-inverted version of the GC, built onto neat PCB's as can be seen in this picture. Very good for a first attempt at home-brew PCBs!
|
|
The neat appearance is continued at the rear of the amps which each have a PSU located in a separate case.
|
|
Dave adds:
The cases started as surplus budd-like 4x4x2 inch aluminum boxes with removeable top and bottoms. From there I added a surplus 4x4x3/4 inch aluminum heatsink to the top of the boxes and a piece of 3/16" aluminum for the bottoms. The sides are maple and the front is 1/4" aluminum. The overall size of each monoblock is 5.5" wide by 4.25" deep and 2.5" tall. The heatsink extends an extra 1/2" up. I figure it cost about 30USD for both cases with connectors.
|
|
Site menu
Page menu
Gallery page 1.
Gallery page 2.
Gallery page 4.
Gallery page 5.
Gallery page 6.
| |
|


